by Jared Neibaur
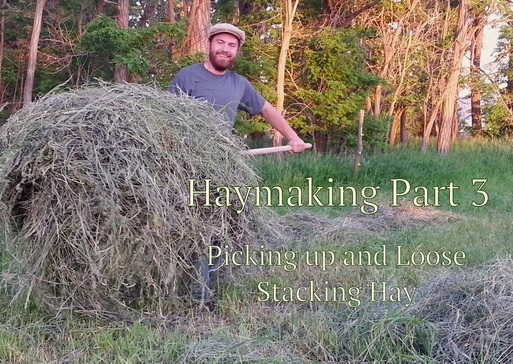
I grew up looking at pictures and drawings of the loose stacks of hay out in the fields. I never thought that I would ever do anything other than bale hay. My opinion changed after my wife and I bought our little homestead with a large storage shed. Our field is small and it makes sense to do everything by hand from the cutting to the drying, to the stacking. The process is really simple to explain but a lot of fun to see. This doesn't describe the fancy stacks necessary to dry and store hay out in the field. This is a method that works great for covered storage.
Picking up the Hay
| In this method of picking up and stacking hay it is very important that the hay is dry. (About 15% moisture content.) To tell if your hay is dry go out to the field and check it in multiple spots. Dig through the windrow a little and see that it is all dry. It should look pale green to straw yellow compared to the live hay, but not too yellow. If you pick up a clump of hay and bend it with two hands it should be crackly and dry, almost brittle. It shouldn't be moist or wet at all. |
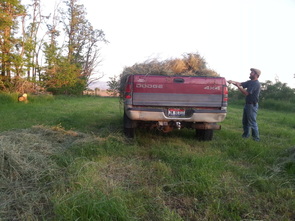
Loose hay takes up a great deal of space compared to baled hay. That can make picking up and transporting hay a long job if you don't have a truck or a trailer or if you have to transport your hay a long distance. I own a truck that I use to move my hay from the field to the shed.
It is worth buying a good pitchfork for working with loose hay. It may be as vital as a shovel is for digging in the dirt. Pitchforks with two to five prongs work the best for hay. I would recommend three or four prongs for loose hay. In the world of loose hay, less is more.
It is worth buying a good pitchfork for working with loose hay. It may be as vital as a shovel is for digging in the dirt. Pitchforks with two to five prongs work the best for hay. I would recommend three or four prongs for loose hay. In the world of loose hay, less is more.
| | There are two simple methods for collecting a big pitchfork full of loose hay. The first method is to lift the hay in the windrow and set it down again on the hay in front and repeating that process, essentially making a tall pile with a good center of balance. The pile is then lifted with the pitchfork from the bottom and carried to the truck. The second method is to set the end of the pitchfork at the end of the row (with a little momentum) and push along the windrow until you have a good scoop to take to the tuck. I use the first method because I grew up with it, but the second method may be growing on me. |
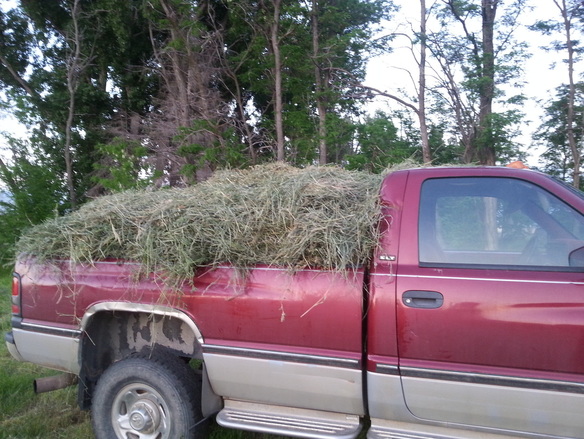
Working with loose hay, I am always amazed at how much I can fit on a fork and how much I can fit in a truck. It always looks like it is full and it will always hold a little more. As you make your stack on your truck or trailer, tromp it down a little to pack it tight and then add a little more. If the wind isn't blowing and if you don't have far to go, you can build a stack of hay in the back of your truck that stands well above the cab. On the day I collected my hay, the wind was blowing so I didn't fill it so full.
An important final step is to go around the field with a good rake and rake together the stray strands of hay. It is funny how raking all the little bits add up to a lot. I was taught to do this by my Mom who was taught by my grandpa. They would say. "See that bit of hay? Picture a cow eating that hay. Each bit of hay that you save from the field means that much more that a cow can eat in the winter." I raked up enough out of the field in this crop to feed a cow for at least a day.
Stacking the Hay
In building a stack under a shelter it is important to keep things dry. Only put the hay on a dry floor that stays dry and under a roof that doesn't leak too much. When you stack hay without air ventilation in the middle it is important that it is dry like I described above. Appropriately drying hay and keeping it dry is vital to your success in storing good hay for your animals.
Start with a good clean space and make a base by setting even piles of hay around the perimeter of the stack. Set the hay down in a way that it overlaps but slopes inward toward the center of the stack. Continue to build the stack in this manner starting in a curricular motion around the parameter of the stack and working in toward the center. It is possible to stack a loose stack high above ones head but remember that loose hay is slick and can shift and slide so don't ever endanger yourself. A good trick is to allow the parameter of the stack to gradually slope inward as you stack.
As you can see the actual process of stacking the hay under a shed is quite simple. This is probably the easiest way to store loose hay. The biggest setback is having the space available for the hay.
Thank you as always for supporting Simple Ground by reading our articles and sharing them with your friends. We would like to hear from you about your haying experiences just leave a comment in the comments section below.


 RSS Feed